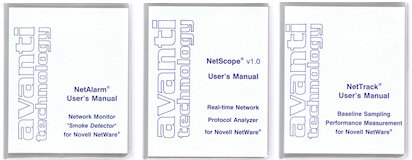
// First we need to check that MONITOR.NLM is loaded with Processor // Utilization support enabled. For NetWare v3, that requires the // -P option be specified. Otherwise, the support is automatic. // The easiest way is to check if it is loaded and unload it, if so. IF LOADED MONITOR.NLM THEN UNLOAD MONITOR WAIT 1 // Now, make sure MONITOR.NLM is loaded (adding the -P option does // not adversely affect NetWare v4/v5 Servers - they ignore it). IF NOT LOADED MONITOR.NLM THEN LOAD MONITOR -P // We need to check for success in loading MONITOR since the rest of // this batch job is useless without it. IF NOT LOADED MONITOR.NLM THEN ABORT // Now check if the active console screen displayed is the MONITOR NLM Screen // (Note: The active screen name can be determined by pressing the Alt key // on the server console.) Since we loaded MONITOR then the active console // screen should be the "Monitor Screen". However, this test will insure // that the "Monitor Screen" is the active console screen, just in case. IF "%NW_VERSION%"=="3" AND NOT CURRENT_SCREEN "Monitor Screen" CHANGE_SCREEN "Monitor Screen" IF ERRORLEVEL THEN ABORT ELSEIF "%NW_VERSION%"=="4" AND NOT CURRENT_SCREEN "NetWare 4.x Console Monitor" CHANGE_SCREEN "NetWare 4.x Console Monitor" IF ERRORLEVEL THEN ABORT ELSEIF "%NW_VERSION%"=="5" AND NOT CURRENT_SCREEN "NetWare 5 Console Monitor" CHANGE_SCREEN "NetWare 5 Console Monitor" IF ERRORLEVEL THEN ABORT ENDIF // Final check to make sure that the MONITOR.NLM screen is the active screen IF NOT SCAN_STRING "Monitor" "%SCREEN_NAME%" THEN ABORT // Before we proceed much further, we want to make sure that any snapshots // we take are written to a specific directory. Therefore, we should set // the Current Working Directory (CWD) using the CD batch command. CD // can be used with a specific destination directory (e.g., SYS:\SYSTEM) // or a relative directory (e.g., ..\NEW_DIR). It is best to set the // initial CWD to a specific destination directory in order to assure the // validity of subsequent relative directory changes. // First save the Current Working Directory (CWD) DEFINE %0 %CWD% // Now define a new CWD (or default directory) where the // captured screen images should be saved CD SYS:\SYSTEM // At this point, we will assume that this batch file was initiated as // a result of a CPU utilization threshold alarm action by some network // management package. Ideally, we would like to isolate the cause of // the high utilization. To help in this quest, we will capture some // screen data from the MONITOR NLM for later reference. // Simulate the keyin of the Tab key to show the full screen of data // Note: Only required for NetWare v4/v5 releases of MONITOR but does not // affect the operation of NetWare v3 MONITOR so not version conditional KEYIN TAB // Save the current screen image to a text file SAVE_SCREEN %CWD%\PROCUTIL.P00 // Simulate the keyin of the Tab key to restore the Main menu // Note: Only required for NetWare v4/v5 releases of MONITOR but does not // affect the operation of NetWare v3 MONITOR so not version conditional KEYIN TAB // Now we will capture data on the active processes to see what may be // causing the spike. Due to differences in the MONITOR NLM for different // NetWare versions, this requires some version specific logic. IF "%NW_VERSION%"=="5" // The first step is to select the Kernel option from the main menu, // then the Applications option, then the NetWare Application option, // and finally the F4 key to 'View busiest threads'. Hopefully, this // will help us identify which server process may be negatively // impacting the server. // Simulate the keyin of the letters 'Ker' followed by the Enter key // to activate the Kernel option KEYIN "Ker" ENTER // Pause long enough for the Kernel menu to appear WAIT 1 // Simulate the keyin of the letters 'Appl' followed by the // Enter key to activate the Application option KEYIN "Appl" ENTER // Pause long enough for the Applications menu to appear WAIT 1 // Simulate the keyin of the letters 'NetWare' followed by the // Enter key to activate the NetWare Application option KEYIN "NetWare" ENTER // Pause long enough for the NetWare Application menu to appear WAIT 1 // Simulate the keyin of the F4 key to activate the 'View busiest threads' // option KEYIN F4 // Pause long enough for the listing to appear WAIT 6 // Save the current screen image to a text file SAVE_SCREEN %CWD%\PROCUTIL.P01 // Simulate the keyin of the Escape key (return to NetWare Application menu) KEYIN ESC // Simulate the keyin of the Escape key (return to Application menu) KEYIN ESC // Simulate the keyin of the Escape key (return to Kernel menu) KEYIN ESC // Simulate the keyin of the Escape key (return to main menu) KEYIN ESC ELSE // The first step is to select the Processor Utilization option from // the main menu, use the F3 key to list all active processes, and scroll // through each page of active processes, capturing the screen data into // text files for later review. Hopefully, this will help us identify // which server process may be negatively impacting the server. // Simulate the keyin of the letters 'Pro' followed by the Enter key // to activate the Processor Utilization option KEYIN "Pro" ENTER // Pause long enough for the Processor Utilization menu to appear WAIT 1 // Simulate the keyin of the F3 key to activate the 'Select all items' option KEYIN F3 // Pause long enough for the listing to appear WAIT 1 // Define the variable (counter) used for saving the screen images DEFINE %1 01 // We'll use a WHILE/LOOP to change screen pages and capture them WHILE // Save the current screen image to a text file (PROCUTIL.P01 - .P99) SAVE_SCREEN %CWD%\PROCUTIL.P%1 // Check if the histogram message appeared (i.e., last page) or // a maximum number of screen shots (99) have been saved. // If either condition is TRUE then break out of the WHILE/LOOP IF SCAN_SCREEN "Histogram" OR %1==99 THEN BREAK // Simulate the keyin of the PgDn key to show the next page of processes KEYIN PGDN // Pause long enough for the listing to appear WAIT 3 // Increment the screen counter (for the extension .P01 - .P99) DEFINE %1 %1+=01 LOOP // Simulate the keyin of the Escape key (return to Processor Utilization menu) KEYIN ESC // Simulate the keyin of the Escape key (return to the Main menu) KEYIN ESC ENDIF // Now Unload MONITOR.NLM (optional - you may want to keep it loaded) UNLOAD MONITOR // Reset the original Current Working Directory (CWD) CD %0